RackEmApp contains a system that allows you to operate your pool table lights from a mobile tablet and certain supported smart switches, available readily from Shelly.
The smart switches/plugs are installed to the lights, connected to WiFi and you can then remotely control them with some simple configuration.
This combined with the hourly rate settings from table bookings gives you a great low cost solution for charging for your pool tables.
Supported Devices
The devices that have been coinfirmed as working for RackEmApp are as follows, though most other switches in the range are likely to be compatible.
- Shelly 1 Gen 4 (Smart switch)
- Shelly 1 Mini Gen 3 (Smart switch)
- Shelly Plus Plug UK (Smart Plug)
The smart switches require to be wired in to the lighting circuit. The smart plug will work with a standard UK plug and is more flexible and easy to implement.
Setup
When you purchase and have installed your devices,and they are successfully on the WiFiin line with the maufacturers instructions, you are ready to set them up in RackEmApp.
You will need a Shelly account and access to the Shelly Cloud control panel to proceed.
In Venue Management > Settings, scroll down to the Integrated Light Setup section.
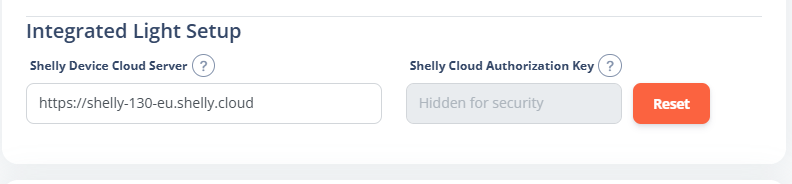
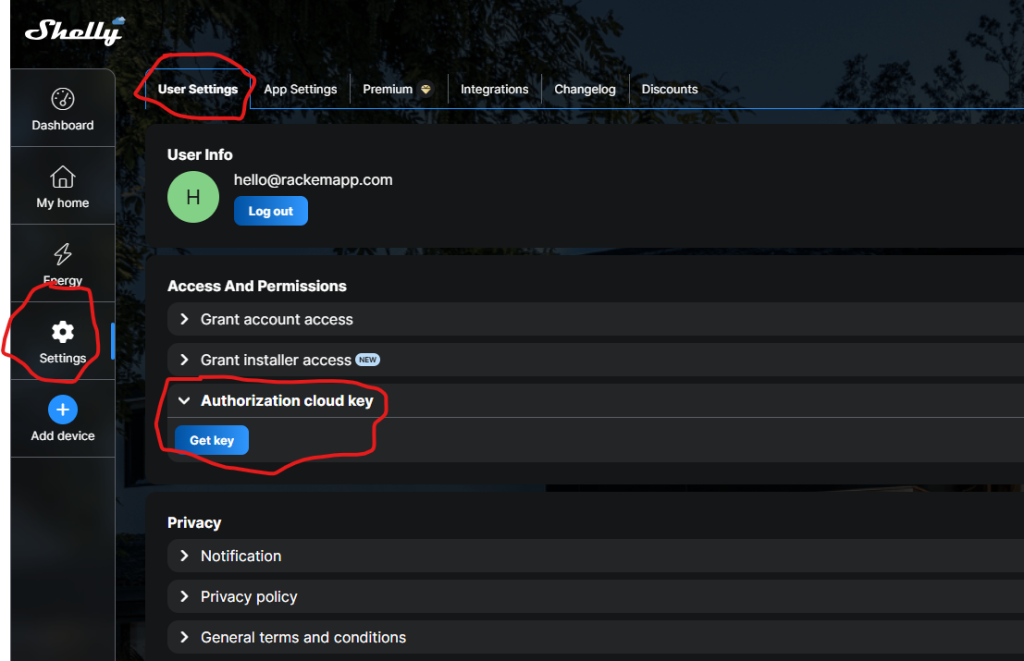
You obtain the Cloud Server and Authorization Key from the SHelly control panel. Go to Settings > User Settings > Authorize cloud key and press Get Key. You can then paste these values into RackEmApp.
Next, you need to link your shelly device to your pool tables. Also in the venue settings, you have your list of pool tables. For any tables where you wish to use a smart device, check the Integrated Light box, and you will see a box to enter your shelly device ID.
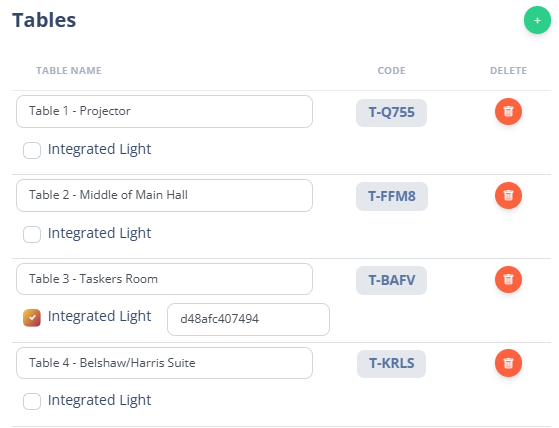
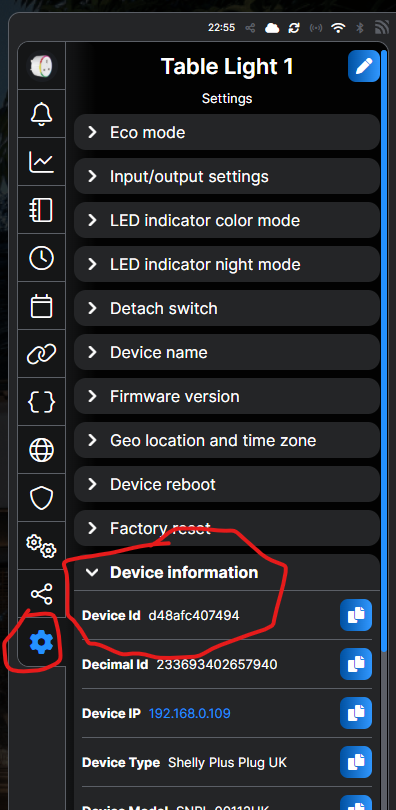
Your device ID can be found in the Shelly Cloud control panel, by selecting your device, clicking the Cog icon (settings) and clicking Device Information to reveal your device ID.
Repeat this step for all lights you need to set up, and remember to press Save.
Hourly Rate
If you do not already use table bookings, you need to also set up the hourly rates for your pool tables. Instructions for this are contained here.
Operation
Operation is designed to be on a tablet fixed behind the bar, that will need to be plugged in and “always on”. Android tablets are usually best for this.
Access the light management through Venue Management > Lights.
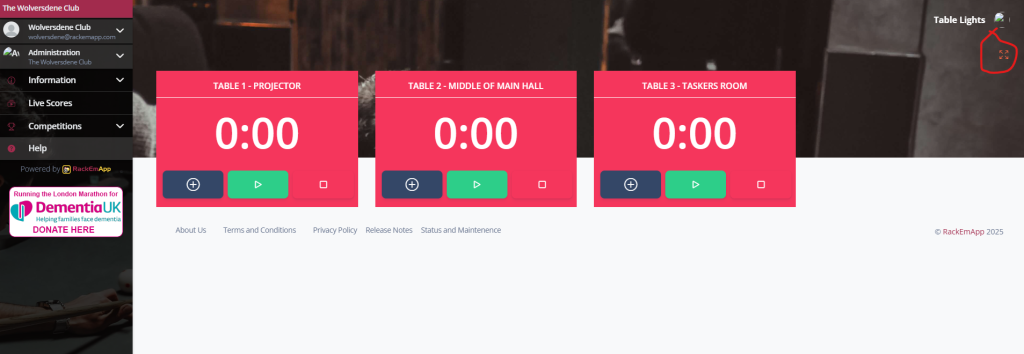
For a better user experience press the full screen buttonwhich will make it more fit for purpose behind the bar.
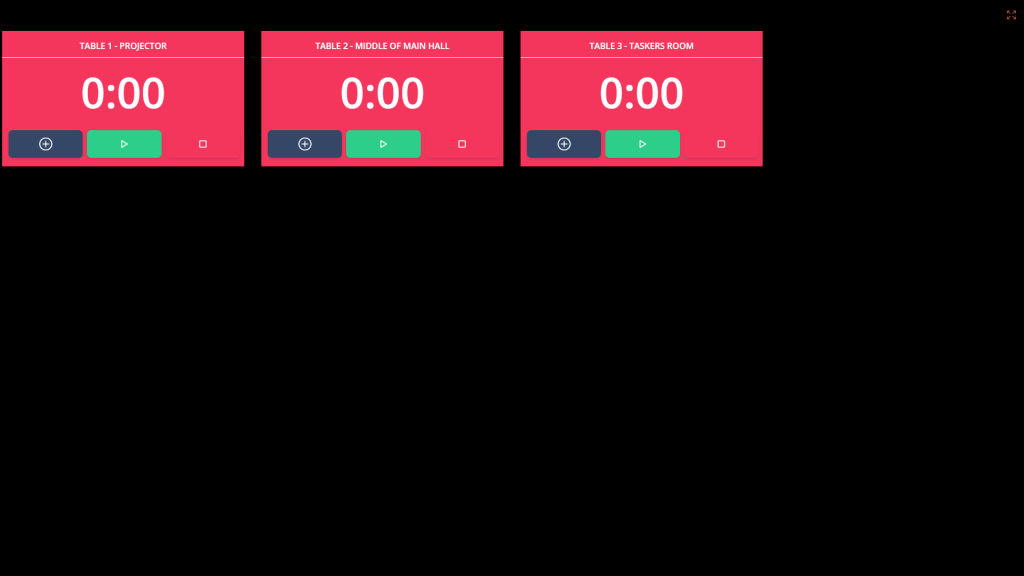
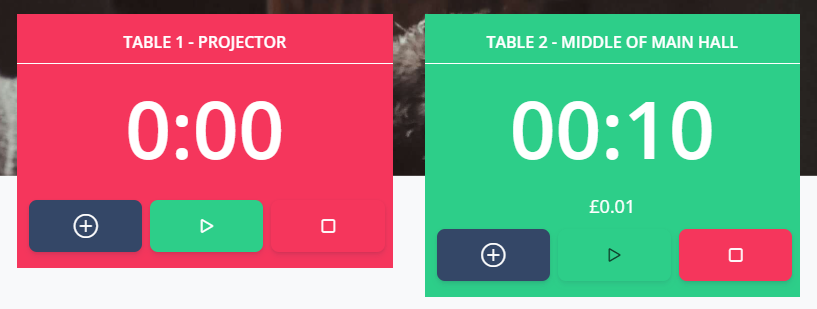
Quite simply, if a light is on, the table will show as green. If the light is off, it will show as red.
There are 3 buttons that support 2 modes of operation.
Pre Pay
For pre-paid time (by the hour) the grey + button will add an hour to the time. Press it for as many hours as the customer is pre-paying for. Then press the green start button to start the timer.
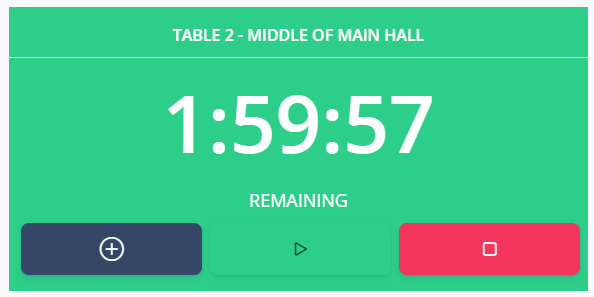
You will see the panel turns green, the light turns on, and the countdown starts.
At any point in time, if the customer wants to pay for another hour, press the grey + button again to add another hour.
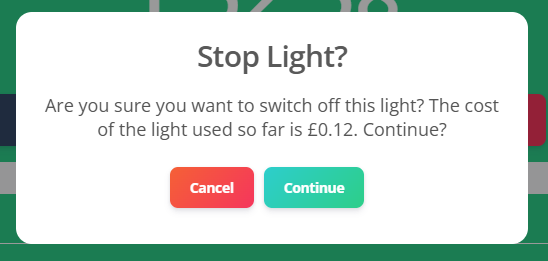
The light will automatically switch off when their time expires, or you can manually stop the light with the red Stop button.
Pay as you Go
If customers are going to simply pay for what they use, you only need to use the green Start button to get going. It will start an upward timer telling you how much time they have used, alongside how much they owe based on the configured hourly rate.
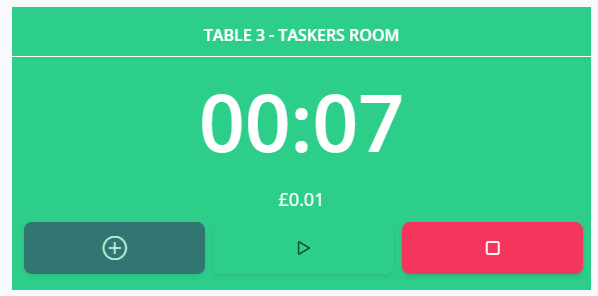
When they come back to pay, press the red stop button. It will warn you and tell you how much they owe, and when you confirm it, the light will switch off.