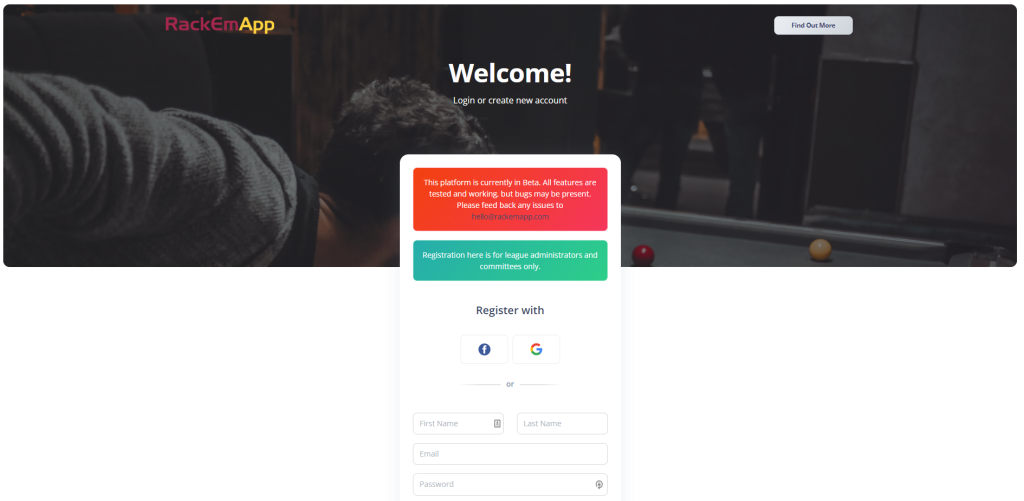
In order to use RackEmApp you need to Register. You need to register using an email address and create a password. This should be a personal account to you and not a shared one, as your registration will include access to your own player profile. But don’t worry, you can invite more of your committee colleagues as Administrators, and we’ll show you how later in this guide.
If you prefer a video guide to this process, most of the content can be found in this video.Otherwise, read on!
Initial Registration
When you sign up, you can use an email address, or register using a social media login. Simply click the relevant buttons.
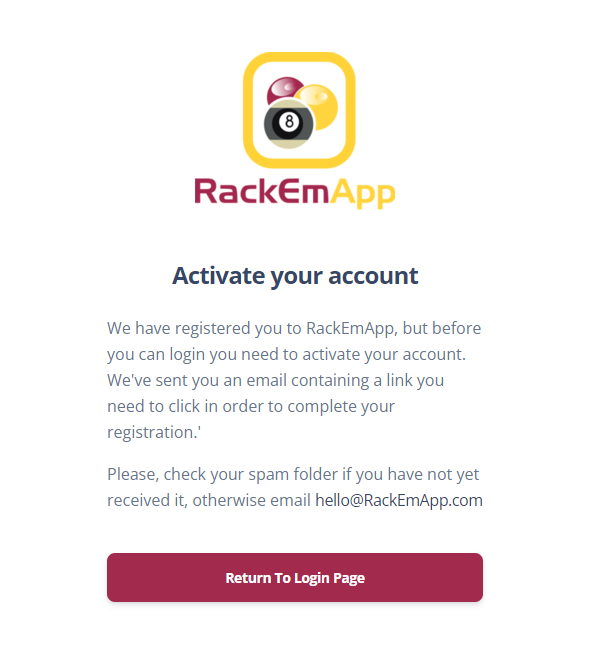
When you register via email, you’ll need to activate it. This allows us to check you have registered a valid email as we use it to communicate critical information to you about the app, but also receive notifications for critical events.
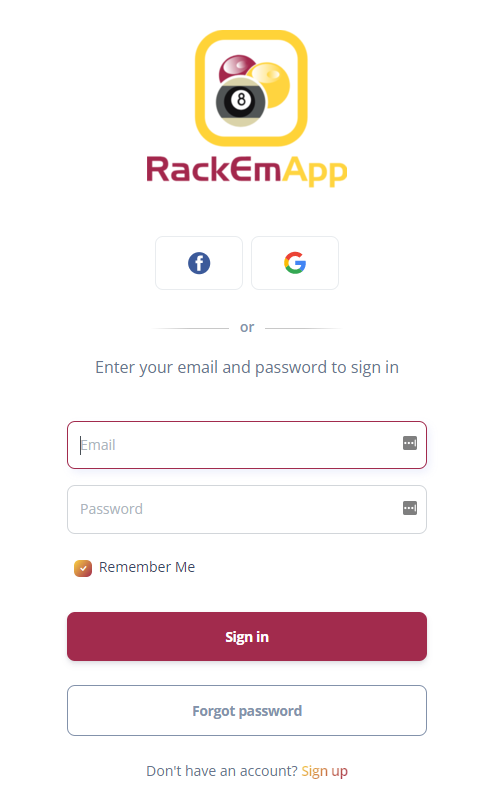
Once activated you can login via the login page. Remember, if you registered with your social media account, you need to login with your social media account too!
When you login you will be presented with an empty league setup screen. We’ll explain what all of these fields mean and why they are important. You can;t proceed without filling these in, but you can return back to this screen any time using the menu. Your Organization > League Settings.
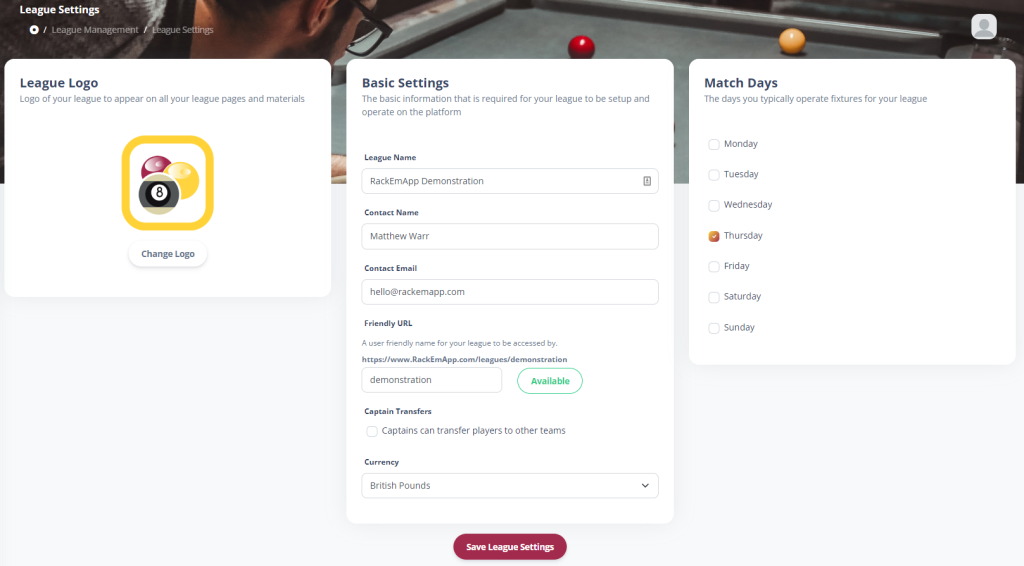
- Logo Upload – This is used on your league web page to brand it in line with your league.
- League Name – The name of your league
- Contact Name and Contact Email – The primary contact person in your league. This could be yourself, or a group email account/list. But this is how people new to the league get in contact with you
- Custom Domain – Set up RackEmApp to use a custom domain name. If you are new to RackEmApp, skip this for now. More details: https://blog.rackemapp.com/?p=538
- Friendly URL – This provides the address to your league. This URL is where you will point your captains players and other visitors as its where you’ll find all the fixtures, results, league tables, competitions and pretty much everything else you need people to know.
- Bank Account and Sort Code – This will be made visible whenever you offer payment by bank transfer, for example when registering a team or a competition entry.
- Captain Transfers – this determines if Captains are allowed to transfer players themselves without league intervention
- Currency – If you want to add online payments to your registration processes, then you need to select a currency
- Break Decider – The method you use to determine who breaks. If you choose “Lag” then it tracks this as a statistic.
- Match Days – The day(s) you usually play. It uses these to generate your season calendar.
- Multi League – This is for when you want to operate different leagues on different days of the week. For more information, click here.
Navigating The Dashboard
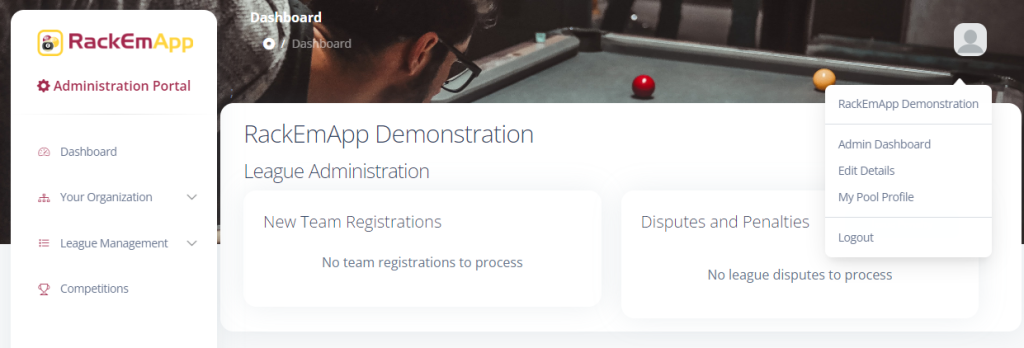
As a league administrator, whenever you login you will be routed to the admin dashboard. There are two menus to take note of.
The left hand menu contains the access to all the main league functions. Its where you access your league setup, competition management as well as manage your teams and players.
There is also an avatar menu when you click it. Here, you can access your league web page, your pool profile and also update your personal account settings (such as changing your password)
Accessing Your League Website
Your league website will be available at the URL it points you you in the “Friendly URL” part of the settings. Keep this handy, as you’ll want to share this soon.
As mentioned above, you can quickly get this link from your avatar menu also.
Adding Additional Administrators
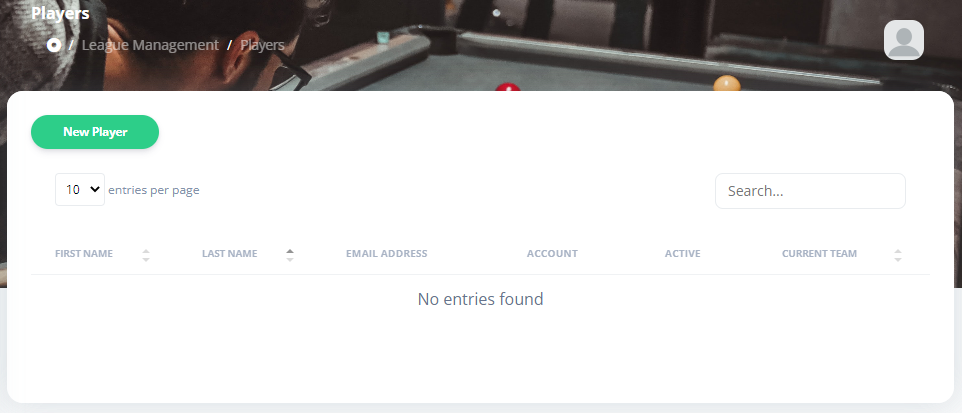
In order to add additional administrators, they need to be registered as Players. From the left menu, choose League Management > Players. It will naturally be empty. Click the New Player button to create one of your colleagues.
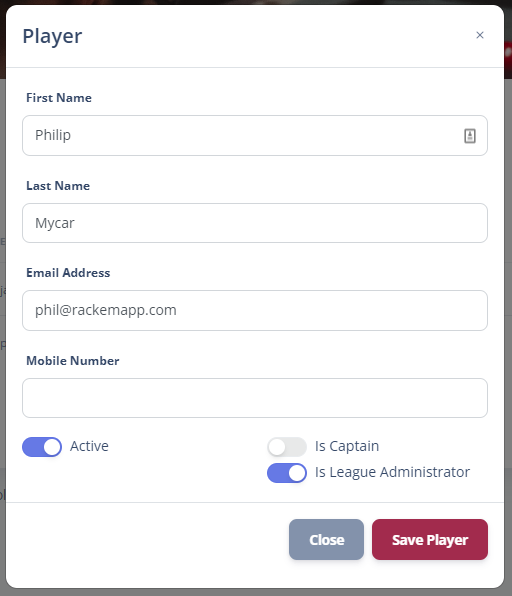
You need to fill in the name and most imporantly the email address of the person you want to register.

If the email address is entered, you can then click the Invite button on the player list for the player you just registered. This will email them an invitation to register their own account.

When the invite is sent, it will change the button to allow you to resend it, or alternatively copy it so you can send it through a direct message or WhatsApp if preferred.

When they have accepted the invite and registered an account, you will see the row in the list change again and shows them as Registered.

Clicking their name you will get some additional options and the one you are interesed in is League Administrator. Enabling this will give the user the same adminsitration privileges as you.
Online Payments
If you want to accept online payments for your team registrations, you can take this opportunity to setup your stripe account in Your Organization > Payment Settings.
To find out all about online payments and how to set them up, click this link.
Conclusion
Your league is now created, you have added additional administrator access, and you have access to your league website. You can now start Setting Up Your Season.